Pimp-my-Boat-Special: How to turn the foredeck of the Pegazus 450 into a cabin
Jan-Ole Puls
· 04.12.2023


In this special:
- How to embellish the console boat
- Pegazus 450 - how we clean our craft boat
- Anti-fouling protection for the Pegazus 450 - Apply antifouling
- How the foredeck of the Pegazus 450 becomes a cabin
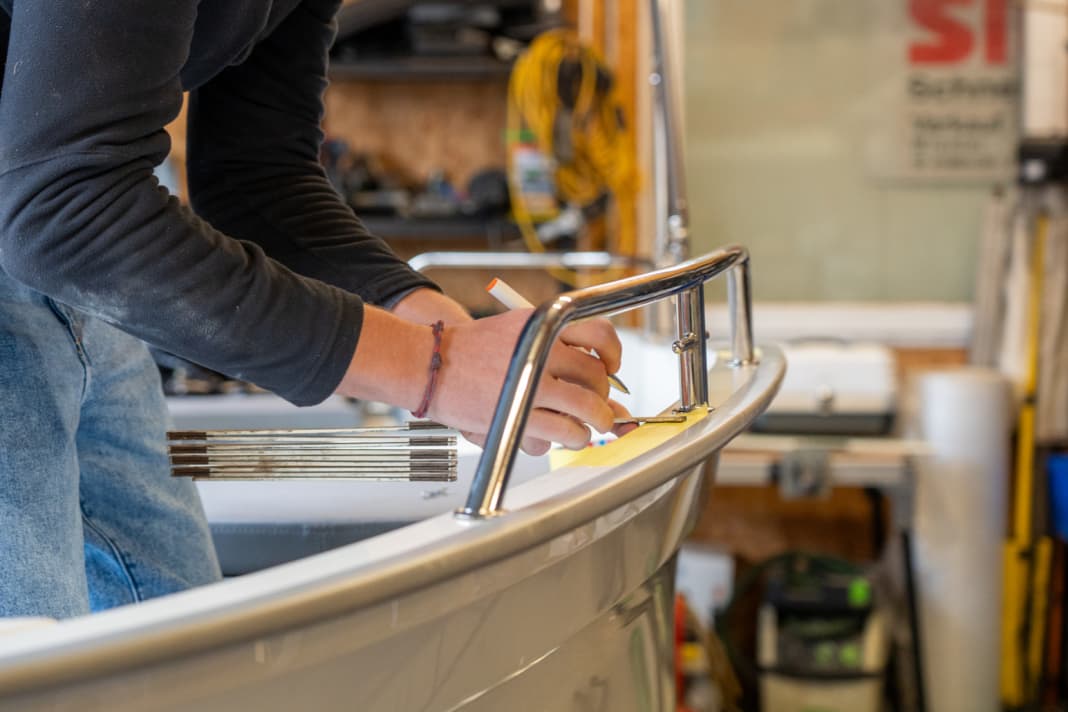
For assembly, we need the tent set, a cordless screwdriver with 2, 6.5 and 12.5 millimetre drill bits, possibly a hoover to remove the shavings, a pencil, a folding rule and adhesive tape. The set includes suitable screws, six stainless steel mounts and the half-round eyelets. The first step in assembling the shelter is to attach the mounts for the tent poles. To do this, six 12.5 millimetre holes must be drilled into the coaming.
The positioning is as follows: Measure vertically upwards from the rear edge of the first bench seat. A straight wooden slat is suitable for this. Now mark the position on the coaming and move it 3 centimetres outwards. This is the best position for the first hole. From there, measure 76.5 centimetres forwards and three centimetres outwards again. We repeat the whole process so that we have a total of three markings on each side. Proceed in the same way on the opposite side. The marked points can now be pre-drilled with a 5 millimetre drill bit and then drilled out with a 12.5 millimetre drill bit.
Preparations for assembly
Now the tent pole holders are used. These are slightly angled so that the tent poles are tilted inwards. To compensate for the angle, the holes need to be bevelled. To do this, we used the 12.5 mm drill bit and enlarged the hole to a roughly suitable angle. The round hole now becomes a kind of oblong hole. The mounts now lie flat on the surface and can be aligned. M6 screws with cap nuts are used for fastening. To do this, simply align the mountings as shown in the pictures and mark the screw holes. Drill with a 6.5 millimetre drill bit, then the mounts can be fitted with sealing compound such as Bostik or Sika.
The tent can then be erected. Anyone who has ever pitched a tent knows the system. The tent poles are inserted into each other and pushed through tabs on the tent. The poles are then inserted into the mounts on the boat and the tent is ready to pitch.
Drill holes for the tent poles in the Pegazus 450
To secure the tent against the wind, tensioning straps and press studs are attached. The latter are screwed to the underside of the coaming. To ensure the positioning and thus the correct fit, the points must be marked. Then mark the positions of the buttons and screw them on along the line, if possible one centimetre away from the rubbing strake. This is best done by pre-drilling with a small drill (2 millimetres). The knobs can then be fitted with screws and sealant. But be careful not to pre-drill too deep, otherwise you will come out on the top of the coaming. Tip: You can either mark the depth on the drill bit with adhesive tape or use additional stop rings. These are then screwed onto the drill and prevent drilling too deep. The version with the adhesive tape is easier, especially with smaller drill bits, but also requires more attention.
The tent is now secured to port and starboard, but there are still fastenings missing to the front and rear. Small semicircular eyelets are attached to the coaming and also screwed in place. The straps can now be attached and tensioned using the existing hooks. If you want to close the tent completely, there is a separate cover for the bow. This is attached to the tent with a zip and also fastened with press studs as described above.
Spending the night on the Pegazus 450? Conclusion on the tent set
Almost three hours and countless drillings later, our Pegazus tent is up and we are surprised at how much space we have gained. There is now enough sleeping space for two people in the small tent cabin. With the additional shelves in the centre, we can even make a double bed. The quality of the tent is good and all the add-on parts look good and of high quality. Although the tent does not turn the Pegazus 450 into a cabin cruiser, it does increase the utility value of the boat immensely.
This article is part of the Pimp-my-Boat special. All contents:
- How to embellish the console boat
- Pegazus 450 - how we clean our craft boat
- Anti-fouling protection for the Pegazus 450 - Apply antifouling
- How the foredeck of the Pegazus 450 becomes a cabin

Jan-Ole Puls
Editor Test & Technology
Ole Puls was born in Schleswig in 1999. He quickly swapped the football pitch for the Schlei and grew up sailing a wide variety of dinghies and tall ships. From his grandfather's self-built wooden opti and a Europe to a 49er and an X362 Sport, there was a lot to choose from. After leaving school, Puls decided to train as a boat builder at the high-tech shipyard Knierim Yachtbau in Kiel in 2016. He successfully completed his training in 2020 and stayed at the shipyard as a bachelor. In 2022, he decided not only to build boats, but also to test them. Since then, he has been working for Delius Klasing Verlag in the Test & Technology section of BOOTE magazine. The training he received and the eye for detail and quality of workmanship he acquired help him immensely today. Even though he is a regatta sailor with heart and soul, he feels right at home on motorboats and enjoys separating his professional and private lives and yet combining them. Because we all know one thing: there is simply no better place to be than on the water.

