

In this special:
- Pegazus 450 - assemble a boat yourself
- How to position the control stand
- How to install the handrail and railing
- Installing the swim ladder, anchor roller and stowage boxes
- How to route battery cables, shift cables and steering cables
- Install the motor correctly
- This is how the assembled Pegazus 450 rides
Movement safety is not only a top priority for the BOOTE testers. A non-slip anti-slip structure on the floor and stable, well-placed handrails are a must for an open boat like the Pegazus 450. Boat manufacturers who cut corners or work sloppily here will quickly be criticised by the testers. Quite rightly so, right? Consequently, we decided to equip our Pegazus with the four-part railing package and invested another 426 euros in it. The delivered package contains a lot of first-class processed stainless steel. In other words, double bow and stern railings and all the screws and washers required for installation. The necessary tools, such as a folding rule, pencil, drill, 13 mm ring spanner, a set of HSS drill bits, sealant, thinner and a few dry cloths must be brought along by the screwdriver.
Transfer dimensions to the boat
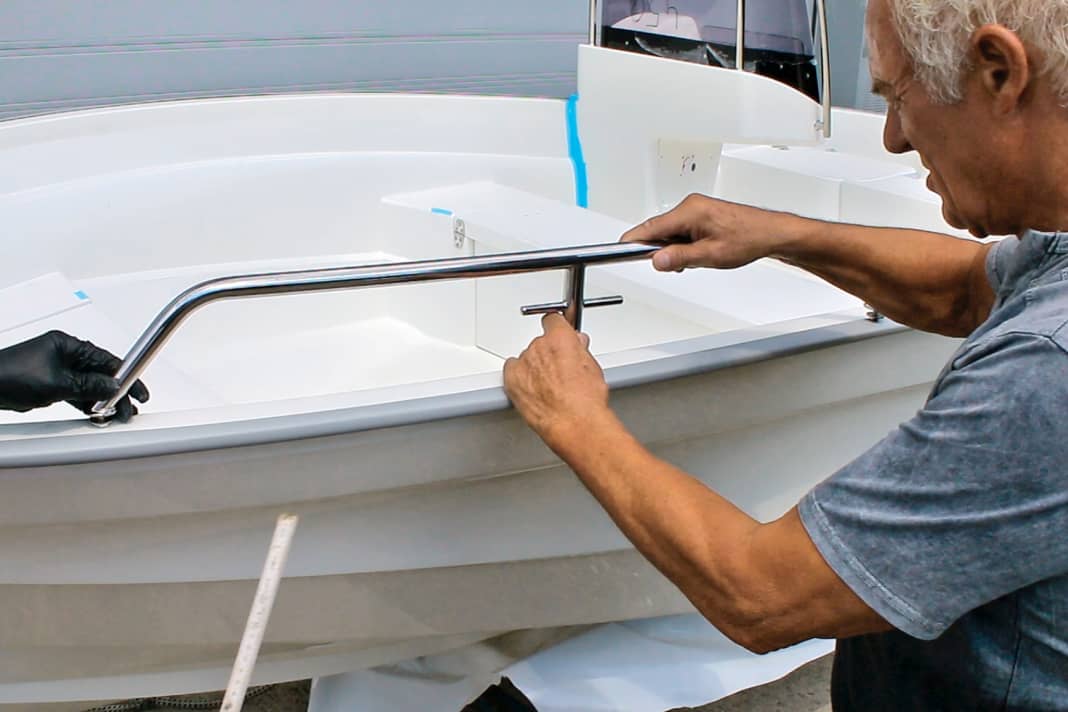
The first step is to transfer the dimensions given in the exemplary assembly instructions to the boat. This means that the first side support of the bow railing should be exactly 325 mm behind the end edge of the foredeck. The railing is now brought into the prescribed position in pairs, if everything fits, the "positions" of the three supports are then marked on the coaming with a pencil.
Important: As there is little space for the screws and washers on the underside, the supports must be positioned directly on the edge of the skirting board. Check all the markings again and only then pre-drill with a small (3.5 mm) drill bit that does not slip as easily as a large one.
Once the holes have been drilled to the correct size with an 8.5 mm drill, the railing should first be fitted "dry" - i.e. without adhesive/sealant - for checking purposes. The fitter must now check whether the railing is really secure. If it is wobbly, the 8 x 30 mm screws must be replaced with the shorter ones (25 mm) supplied as an alternative. If everything fits, the surfaces around the holes can be cleaned with acetone. This helps the polyurethane adhesive applied with the cartridge press to adhere better.
Fit the railing and screw it in place
The railing is then fitted and firmly screwed in place. A tip: it is best to remove excess adhesive immediately with a cloth and thinner. For the stern railing, which is equipped with the same integrated cleat as its pedant in the bow, there is no precisely specified installation dimension. The location is determined by the shape of the hull and the rubbing strake. The railing should be adapted to the shape (slight bending is possible) and mounted as far outwards as possible for the reason just mentioned.
Once everything is in good shape, the positions of the supports can be marked and drilled as usual. Here, too, the excellent assembly instructions recommend a "dress rehearsal in the dry" due to the possible differences in laminate thickness and the associated search for the optimum screw length. If everything fits perfectly, the last item on the programme for the screwdrivers is the "final assembly" with polyurethane adhesive, cleaning cloth and thinner, who will then fit the swim ladder and anchor roller in the next step.
Video
This article is part of the craft boat special. All contents:
- Pegazus 450 - assemble a boat yourself
- How to position the control stand
- How to install the handrail and railing
- Installing the swim ladder, anchor roller and stowage boxes
- How to route battery cables, shift cables and steering cables
- Install the motor correctly
- This is how the assembled Pegazus 450 rides
