Hobby boat special: Installing the swim ladder, anchor roller and stowage boxes
Erich Bogadtke
· 15.10.2023


In this special:
- Pegazus 450 - assemble a boat yourself
- How to position the control stand
- How to install the handrail and railing
- Installing the swim ladder, anchor roller and stowage boxes
- How to route battery cables, shift cables and steering cables
- Install the motor correctly
- This is how the assembled Pegazus 450 rides
Want to hop into the water quickly? No problem if it's nice and warm and the bathing suit fits well. It only becomes a problem when a man or woman involuntarily goes overboard. Whether voluntarily or not, the question is always: how do you get out of there alone, safely and as comfortably as possible? In case of doubt, nothing works without a sensible bathing ladder. Sure, but what does sensible mean?
If you ask the BOOTE testers, who categorise the topic of swim ladders in the safety category for precisely this reason, the ladder should be wide and stable and reach deep into the water when unfolded. Wide, non-slip steps and a locking mechanism (folding ladder) that can also be easily released from the water are a must for the critical testers.
Safety comes first
Safety first! Safety also comes first when anchoring. A suitable anchor, the corresponding line and a solid bow fitting with pulley and curry cleat, in which the line can be "tied" in any desired position, should also be part of the standard equipment for small sports boats such as the Pegazus 450. You can never have enough storage space! Right? If this is offered in combination with a comfortable sunbed, the BOOTE hobbyists' investment in two seat/stowage boxes, two panels and a complete set of cushions is definitely worthwhile. No sooner said than done.
The toolbox now contains a folding rule, pencil, stop square, drill set, drill, adhesive tape, cartridge gun, screwdriver, 13 and 10 mm spanners, emery cloth, acetone and cleaning cloth. The place for the swim ladder, on the port side directly next to the engine sump, and the position for the holes for the fastening screws specified in the exemplary building instructions are quickly found and marked on the hull.
Attaching the swim ladder
In the second step, first pre-drill a small hole (3.5 mm) due to the "risk of slipping" and only then drill out to the correct size (8.5 mm). It is now important to try it on "dry". If the ladder fits perfectly, it can be attached with the supplied sealant (polyurethane adhesive) and screwed in place with the two M8 cap nuts. Large washers and a 13 mm ring spanner are the perfect helpers here. A tip: remove excess adhesive with a cleaning cloth and acetone before it hardens.
This is advice that we also give when fitting the bow fitting. Beforehand, we measured and marked the "centre line" on the foredeck using a folding rule and stop square. When marking the holes for the fixing screws, the base plate of the fitting, which should be flush with the rubbing strake, serves as a template. Once the "marks" have been made, first drill small holes (3.5 mm) and then large holes (6.5 mm) as usual. This is followed by a "dry fit test". If everything is correct, the holes are cleaned with acetone and sealed with glue.
Storage space on board the Pegazus 450
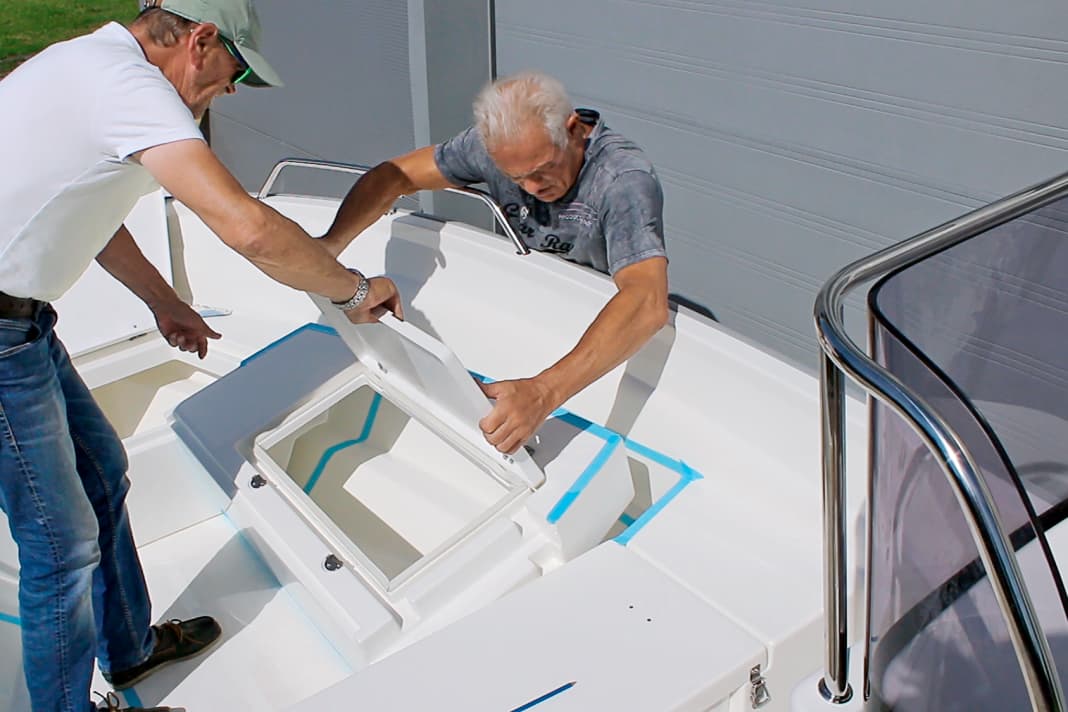
In the final assembly stage, we then screw the base plate and bow fitting firmly to the deck using two 6 mm countersunk screws, washers and the appropriate cap nuts. To do this, we need a medium-sized Phillips screwdriver and a 10 mm ring spanner. Where to put the fenders, lines, harbour tarpaulin & co? We need storage space! And the boat builder supplies this integrated in prefabricated bench consoles, first-class workmanship and complete with everything that goes with it. This means a cover, solid hinges, carefully rounded cut edges and a final coat of paint. The seat/stowage boxes are not screwed but glued to the hull. This saves labour and, provided you use a professional polyurethane adhesive, guarantees that the stowage boxes are tight, which has advantages and disadvantages (no self-draining).
In the first step, the boxes are placed in their position in the boat, the gluing surfaces are marked on the inside and outside and then sanded and degreased with acetone. The gluing surfaces on the boxes are sanded at the factory. To ensure that the adhesive only goes where it is supposed to, all bonding surfaces are carefully masked with millimetre precision. Before things get really serious, the "handymen" place the boxes dry in the boat and check whether the two panels of the sunbed fit properly. They must not jam or rattle, and the height must be correct. A tip: Wear gloves when applying the glue from the cartridge. This stuff is "real"! Then place the boxes without much sliding and press them into place using muscle power so that the adhesive is well distributed. Finally, insert the panels to fix them in place, allow the whole thing to dry for 24 hours and then seal all joints cleanly with Sikaflex adhesive.
Video
This article is part of the craft boat special. All contents:
- Pegazus 450 - assemble a boat yourself
- How to position the control stand
- How to install the handrail and railing
- Installing the swim ladder, anchor roller and stowage boxes
- How to route battery cables, shift cables and steering cables
- Install the motor correctly
- This is how the assembled Pegazus 450 rides

