Winter series: Winterising in the water - how to keep your berth ice-free
Torsten Moench
· 08.01.2026

More content from the winter series:
- Winterising in the water - how to keep your berth ice-free
- Dehumidifier - keeping the air on board dry
- Antifreeze - it's all about the right mixture
- Heaters - alternative heat sources for your boat
- Remote monitoring via camera - everything in view
More and more owners are deciding to leave their boat in the water during the winter. The reasons for this and the advantages and disadvantages are open to debate. However, one thing is clear: even in winter, a boat tour or at least a mulled wine evening with friends and acquaintances on board can have its charm. And anyone who has ever spent a New Year's Eve party on a boat will certainly not want to miss this event again.
However, it is also clear that safety measures should always be taken, for example to prevent the floating boat from freezing. You should also protect your boat and equipment from moisture to make your stay on board as comfortable as possible. In our winter journal, we provide tips on the following topics: Mooring, heating, dehumidification, frost protection and monitoring.
Safety for the hull - keeping the berth free of ice
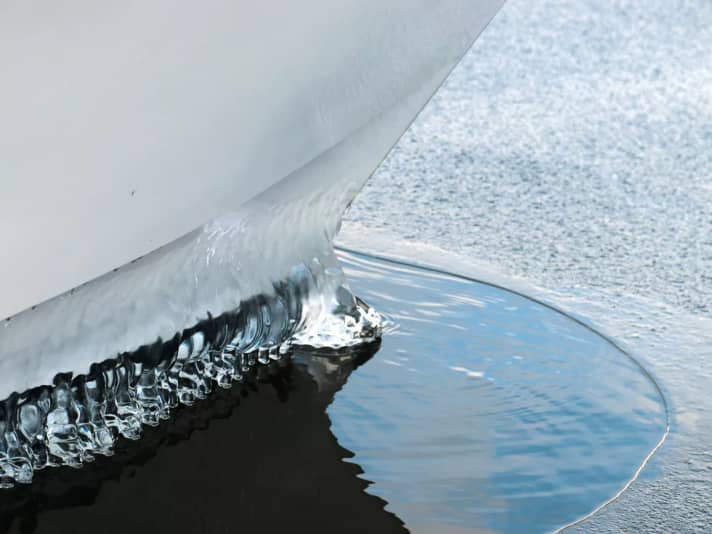
Submersible pumps or aerators prevent the boat from freezing in the water
There are basically two tried and tested techniques for keeping your berth free of ice. The simplest option is to use one or two submersible pumps. If necessary, they pump the warmer deep water under the hull of the boat to keep it free of ice. Even with air temperatures in the double-digit minus range, the water in the deeper layers never cools below zero degrees. In winter, temperatures of between two and four degrees Celsius are common in water depths of two to three metres.
If this "warm" water is now pumped to the surface, the higher temperature and the movement of the water surface ensure that the hull and its fittings are prevented from freezing.
Photo instructions: Build your own pump system and what you need for it
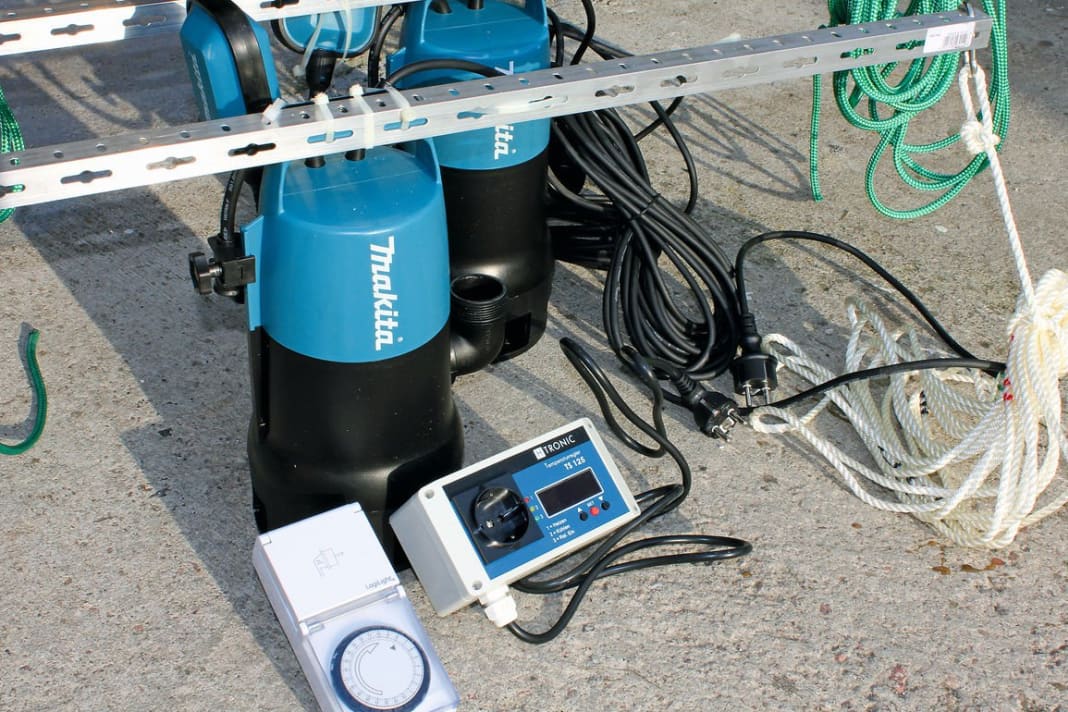


The function
Our "ice-free system" operates in two stages and only switches the pumps on when there is an actual demand. This behaviour is implemented firstly by a temperature switch and secondly by a timer connected in series.
In practice, a floating thermal sensor monitors the water temperature and forwards this value to the temperature switch. If the temperature on the water surface drops below zero degrees, the timer is activated, which in turn runs the pumps at the previously selected rhythm. Depending on the timer used, it can be programmed in 10 or 15-minute increments.
In practice, 15 minutes of pumping time per hour is sufficient throughout the winter, with 2 x 15 minutes per hour being sufficient on particularly frosty days.
The minimum equipment required is a temperature switch with external sensor, a timer for outdoor use and at least one submersible pump (see parts list).
Pumps
There are several things to consider when selecting a pump: Firstly, the pump must be "suitable for dirty water". Contamination in the harbour water or unintentional ground contact can otherwise damage the blades of the submersible pumps and lead to failure. Secondly, the pump must have a sufficient immersion depth. Depending on the type of boat, five metres immersion depth should always be sufficient. The pumping capacity is directly related to the electrical power. To keep the electricity costs within reasonable limits, we opted for a 400 watt pump with a flow rate of 140 litres per minute. If necessary, around two tonnes of "warm water" are therefore pumped under the hull of the boat per switching cycle (15 min); experience shows: That's more than enough. Depending on the length of the boat, several pumps should be used. For small and medium-sized boats up to around eight metres in length, one pump is sufficient; for boats longer than this, two or even three pumps should be used, which should then be distributed along the hull according to the length of the boat.
Pump assembly
The be-all and end-all of a functioning ice-free system is the correct positioning of the pumps. As a submersible pump develops a torque when it is switched on, which is supported by the water flow during operation, suitable measures must be taken to prevent it from turning on its own axis. The best way to do this is with a cross strut about 1.5 metres long, with a fastening line at each end leading to the railing on starboard and port (see drawing).
In our case, we used an aluminium angle profile, in the middle of which we fastened the pump with several sturdy cable ties. It is important that the pump outlet does not point to the side, but upwards. It is also important to ensure that the lines attached on both sides are always the same length so that the cross strut and pump hang horizontally under the boat. This is achieved by means of coloured markings on the lines (paint). The lines are then attached to the railing or the cleats. If only one pump is used, it should be positioned approximately amidships. If you are using two pumps, the rear pump should be located under the engine compartment and the front pump about a third of the length of the boat from the bow. How deep the pump hangs under the boat depends, among other things, on the water depth. In practice, depths of around 1.5 to 2 metres under the keel have proven to be the best.
Timer and temperature monitor
In winter, the pumps are switched on and off by the timer, which in turn is supplied with power by the temperature switch. In plain language: The shore-side 230-volt supply first goes to the temperature switch and from there to the timer.
As both devices are fitted with conventional 230-volt Schuko sockets, they can simply be plugged into each other. Important: The switching capacity of both components must be at least equal to the maximum pump output. For our 400 watt pump, the temperature switch and timer must therefore be designed for at least 500 watts. In order to be able to cope with the higher starting current of the pump, it is best to look for 16-amp models when buying, so you are always on the safe side. The temperature switch must always have a waterproof external sensor.
To protect all the technology from the effects of the winter weather, we installed switches and sockets in a suitable plastic box on deck. If the cable lengths are sufficient, the box can also be placed in the cockpit or in the driving position. Depending on the temperature switch, the switch-on and switch-off temperatures can be freely selected. With our H-Tronic temperature monitor, we set the switch-on temperature (heating) to zero degrees and the switch-off temperature to four degrees. For commissioning, all you have to do now is connect the individual parts together as described and connect the temperature switch to the shore connection.
Air bubble system
The second option, which is often used by entire clubs or marinas in winter, are so-called air bubble systems. They can be installed locally for individual berths or for entire harbour facilities.
Explanation in photos: How rising air bubbles bof the bubble system ensure movement
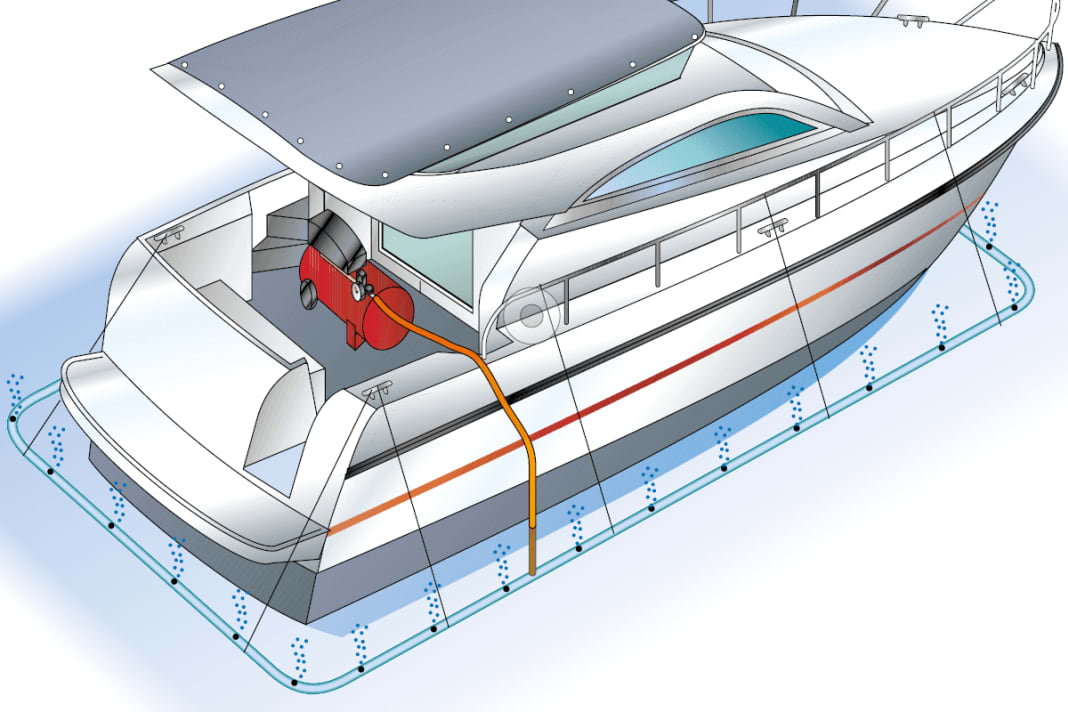


The pipes
The first step is to determine the length of the pipe system required. To do this, calculate the boat circumference, i.e. double the boat length plus double the boat width. It is important that you use the maximum values so that it doesn't get too tight later when assembling. The required compressor capacity can now be calculated from the length of the tubes, the number of holes and their diameter. Experience shows that 1-millimetre holes at intervals of around one metre are sufficient to prevent the water surface from freezing over.
Once the length of the pipework has been determined, purchase 1-inch plastic pipes, the necessary connectors and elbows and a T-piece for the compressor connection from the DIY store. Now assemble the pipe system on land. Make sure that it remains pluggable in some places to make it easier to transport and install later. It is also important that the T-piece for the compressor connection is located approximately in the rear third of the pipe system (depending on the planned location of the compressor). Connections that do not need to be undone can be fixed with plastic adhesive.
The next step is to drill the 1-millimetre holes. These are drilled about one metre apart on the top of the pipe.
The attachment
The system is now attached to the boat. The easiest way to do this is with lines that are attached to the railing or handrails. Make sure that the pipes hang about half a metre below the surface of the water. For the connection between the pipe system and the compressor, use a hose line that is connected to the T-piece with stainless steel clamps.
Compressor
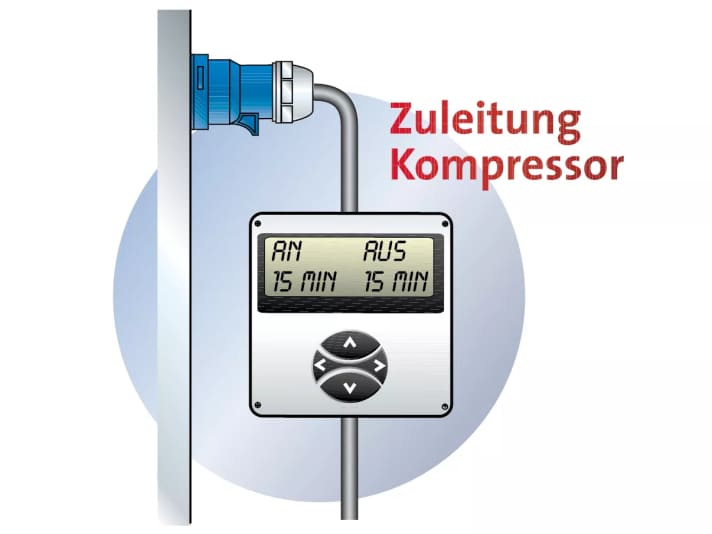
Because the compressor does not have to run continuously in winter, depending on the outside temperature (intervals of 15 minutes are sufficient), it makes sense to control it using a 230-volt timer. Such timers are also available from DIY stores, but you must ensure that the timer is suitable for the high switch-on currents of the compressor. Depending on the compressor, these can be up to three times the specified rated current.
Where you set up the compressor depends on the conditions in the boat. However, a location in the cockpit is usually protected from the weather and offers the shortest connection to the pipe system.
How to calculate the compressor
Length of pipework in m / drilling distance in m times 0.7 m3/h gives the compressor capacity in m3/h.
- Example of a 10 metre boat: 27 m / 1 m x 0.7 m3/h = 18.9 m3/h
The compressor should therefore have an output of around 20 m3/h. This rule of thumb applies to 1-millimetre boreholes, a pipe immersion depth of around 1/2 metre and a compressor pressure of 1 bar.
Read the other parts of the winter series:
- Winterising in the water - how to keep your berth ice-free
- Dehumidifier - keeping the air on board dry
- Antifreeze - it all depends on the right mixture
- Heaters - alternative heat sources for your boat
- Remote monitoring via camera - everything in view

