

The biggest enemy of surfaces is UV radiation, which is responsible for the chalking of gelcoat and the weathering of paint layers. This causes small particles of paint or gelcoat to emerge; the paintwork becomes matt and rough, making it easier for dirt particles to adhere to it.
In order to make such unsightly surfaces shine in new splendour, they must be treated. There are two types of polishing agents for this:
- Polishes that only remove a small amount of the surface, but fill the holes with components such as wax and form a glossy layer. These products are quick and easy to apply. The disadvantage, however, is that the sealant usually does not last the entire season and the polishing process has to be repeated.
- Professional polishes that remove unevenness with different sized abrasive grains in the liquid or paste. This makes the surfaces really smooth and shiny again. However, this work requires considerably more time and a final sealing, for example with a wax, is also necessary. The big advantage: stability throughout the season.
The products used
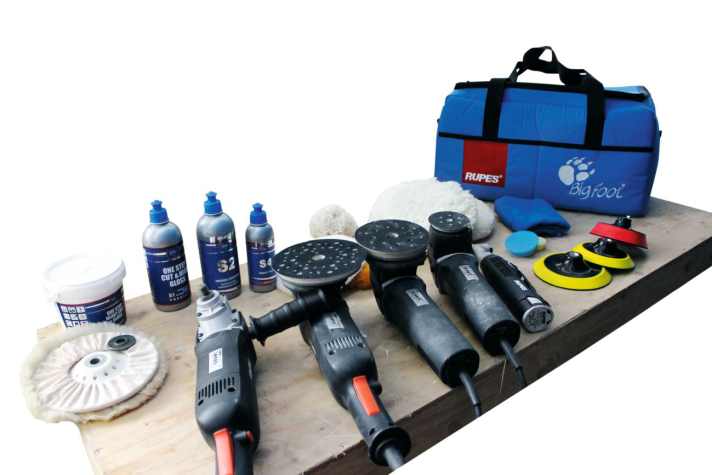
We show you how to carry out this work correctly using polishing products from Sea Line; we are assisted by machines from Rupes.

As a general rule, the more weathered or rough a surface is, the coarser the abrasives of the polish must be. There is a direct correlation between the grain size and the degree of gloss that can be achieved. In order to achieve the highest possible gloss level, we must therefore gradually switch from a coarse polishing agent to a finer one.
In the case of very heavy weathering, professionals work with coarse agents to remove part of the old coating as a first step. Do-it-yourself polishers should, however, work carefully with these pastes so that they do not remove too much of the gelcoat or paint layer - and then, in the worst case, hit laminate or primer!
Back to the gloss level: The experts at Sea Line recommend a value of around 80 (maximum possible: 100) before sealing the surface. This can be achieved with the products S05 One Step or S1 One Step, for example. As the addition "One Step" suggests, one product is sufficient for polishing, as the initially coarse grain is ground into smaller and smaller components during the process, leaving an ever finer surface. Perfectionists, however, still work with the S2 Polishing Past to achieve a gloss level of almost 100. The surface is then cleaned with a cloth and cleaner (S3 Protect Cleaning Liquid) and sealed with S4 Protect Wax.
The polishing process
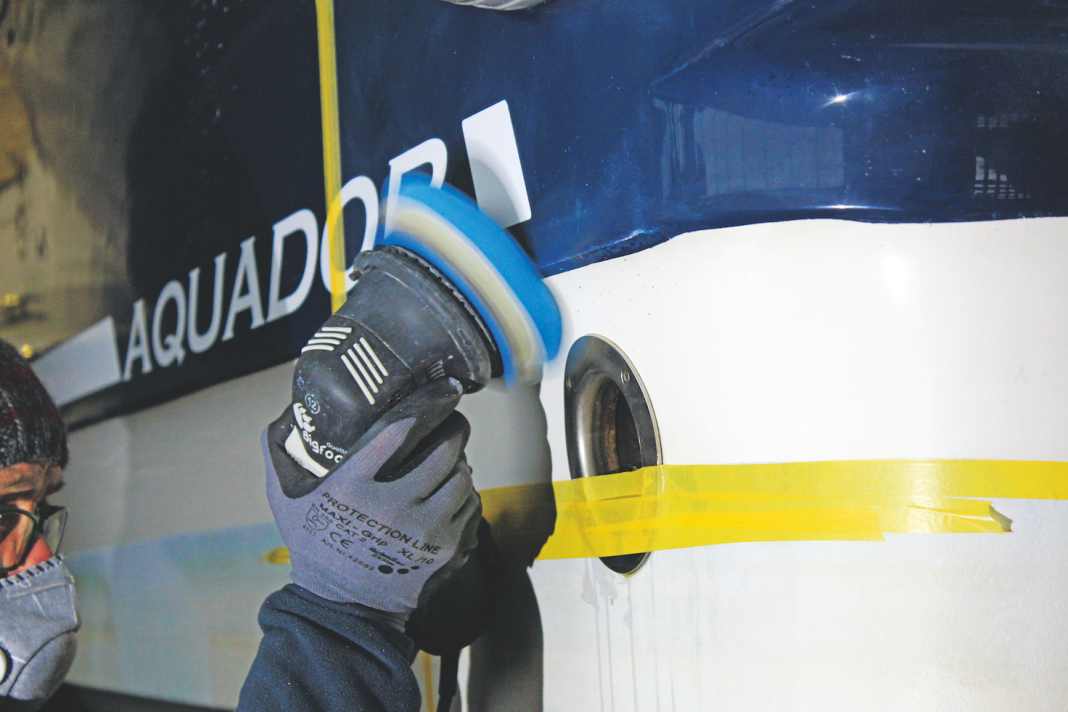
However, the polishing agents are only half the battle - they also have to be used correctly. If you want to do this purely by hand, you will soon realise that the polishing process becomes an endless task. That's why it's better to use machines: There are rotary machines on offer - these rotate like an angle grinder, but with adjustable speed - and eccentric machines, which, as the name suggests, work off-centre. Professionals usually prepare the surface with rotary machines as they are quick and effective.
Disadvantage: You need to be very experienced in your movements in order to polish every area evenly; for the inexperienced, this can quickly turn into hard labour. Eccentric machines are noticeably easier to use and therefore well suited for DIY enthusiasts. Depending on the model (e.g. the Rupes LHR 12 E Duetts), they can even be held with just one hand and glided over the surface. Disadvantage: The polishing process takes about twice as much time as with the alternative.
Either sheepskin/lambskin discs or foam pads are placed on the discs of the rotary polishing machine. The rule here is: the coarser the surface to be polished, the coarser the abrasive paste and the abrasive attachment. So start with a sheepskin or a hard sponge pad, then move on to the lambskin roller or the soft foam pad until you reach the finest polishing grit. The pads are best suited for the eccentric device. Particularly practical here: the colour indicates the respective degree of hardness - black indicates the coarsest, white the softest.
Basic information
- Before you start polishing, the edges, for example to the antifouling attachment, must be marked with adhesive tape so that the transition is not damaged. Careful cleaning with a special cleaner (see above for type) and microfibre cloth is also required before polishing.
- Use the polishing paste sparingly. If it becomes too dry during the process - which can be the case on warm days in particular - simply moisten it with a little water and continue until the desired end result is achieved.
- First set the speed of the polishing machine to slow and then increase it in small steps. Once the work is done, the polishing discs can be cleaned in the washing machine.
The products in comparison

Video instructions on booteTV
This article first appeared in BOOTE 4/2017 and has been revised for this online version.

