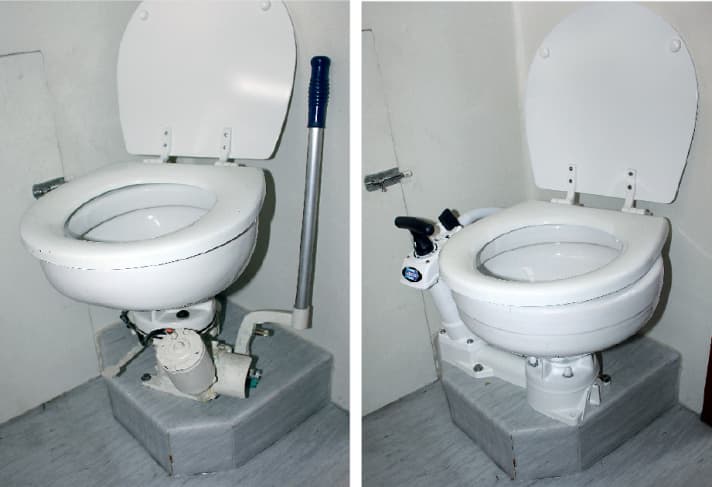

Forty years is a long time. An electric toilet pump can give up the ghost. And the valves, membranes and seals are no longer the youngest either. Time to think about a new toilet, especially as the man in the spare parts store was already talking about parting company last time. The question remains, what should the new one look like? Should it be an electric toilet again, or will a manual one suffice? Of course, an electric toilet offers more comfort, but is also three times as expensive as a manual toilet. The Jabsco Yacht WC Compact shown here is available from specialised dealers for around 140 euros. Provided the fitter knows how to use tools, it is easy to install and requires little maintenance. So in this case, it's just the thing.
1 Closed today:
Before starting the conversion work, the bottom valves for water intake (¾ inch) and faeces outlet
1 ½ inch) must be closed. It is essential that stiff or defective valves are made operable or replaced. It goes without saying that the boat must be taken ashore for this.

2 The simple solution:
Loosen the hose clamps on the intake and outlet lines. A tip: Sometimes it is easier to loosen the connection flanges first and then the clamps.
3 One, two, three, four:
Fully unscrew the 8 mm hexagon head wood screws screwed into matching plugs. Where a ratchet and socket cannot reach, a 13 mm ring spanner or open-end spanner will help.

4 Clean and tidy:
Once the old toilet bowl has been removed, the linoleum on the base can be thoroughly cleaned. Remove the electric pump cables or insulate them properly (insulating tape or shrink tubing). A tip: Now is the best opportunity to replace old, hardened hoses with new spiral or fabric hoses (inlet) and odour-proof faeces hoses (outlet).

5 & 6 Seat selection:
Where is the best place for the new pool? Hose lines must not be kinked under any circumstances!
7a Loosen the base: If the pump needs to be moved from one side to the other, as in our case, first remove the toilet bowl from the base. To do this, remove the four screws.
7b Loosen the pump unit: Next, remove the pump unit from the base and replace it rotated by 180 degrees. Caution: The seal must not be damaged in the process.
7c Turn seal round: The seal must also be rotated by 180 degrees. It is important that the three small rubber nipples are reinserted correctly into the base.

7d Fit the pump unit: Once the pump unit has been turned, it can be reattached with the screws. As these are plastic parts, you should proceed with caution, otherwise they will break.
7e Adjust the installation location:
Once the base and pump have been reunited, the final installation location is determined. It is important to ensure that all four fixing screws are firmly secured to the base (in this case a panelled plastic base). The hose lengths of the outflow and inflow must also be taken into account. It must also be possible to reach the pump easily when seated.

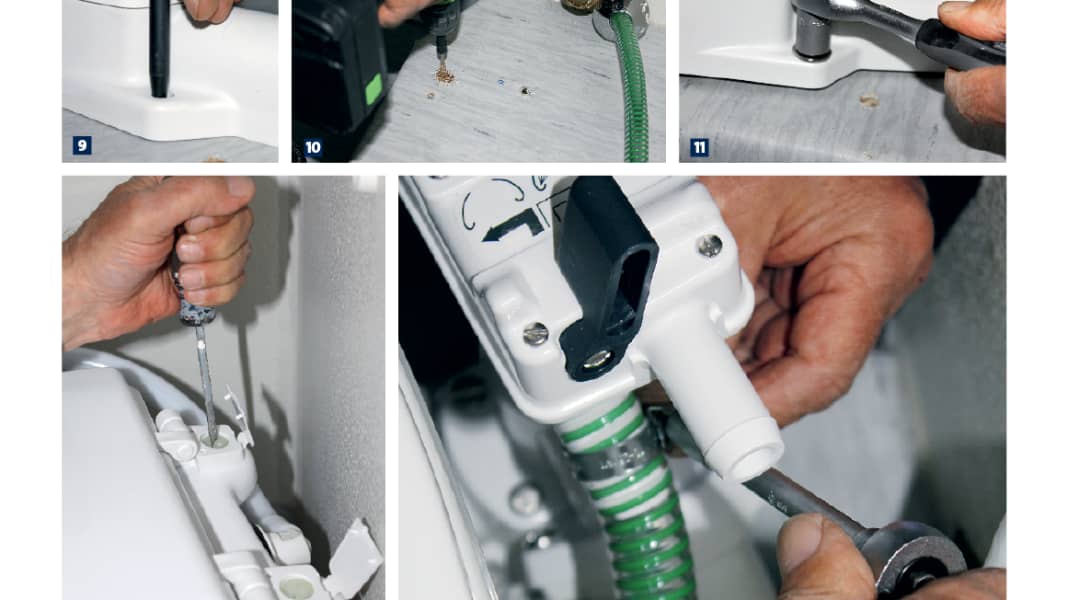
8 position changes:
If you loosen the two (slotted) screws on the spectacle flange of the hand pump, the connection for the toilet outlet can be easily twisted and brought into the correct position.
9 Setting an example:
Once the new or old hose lines are the right length and the best location for the new toilet has been found, the holes for the fixing screws can be marked with a smudge-proof felt-tip pen.
10 Easier said than done:
Pre-drill the holes for the fixing screws, using a cordless drill to create more freedom of movement. The size of the drill bit is determined by the screws (8 mm) and the wood (soft or hard). We were absolutely right with a 5 mm drill bit. A tip: It's better to drill too small than too big. If it gets tight, a little grease on the screws works wonders.
11 A matter of feeling:
Insert the four 8 mm hexagonal wood screws and tighten with a ratchet and socket. Important: If, like us, you are working with 40-year-old wood, you should do the latter with a lot of feeling. After tight comes loose.
12 Seat:
Fit the toilet seat using the fastening parts supplied. The fitter will need a flat-blade screwdriver and a little feeling.
13 Sooner or later:
It might be better to put the hoses in place before the toilet is screwed on. A tip: If it gets stuck, flushing agent or heat can help.


